
DIY Tips for Popcorn Removal
Popcorn ceilings, also known as textured or acoustic ceilings, were once popular in home construction due to their sound-dampening and easy application properties. However, they have become outdated over time, and many homeowners now prefer smooth, modern ceilings. If you’re ready to bid farewell to your popcorn ceilings, this DIY guide will provide you with useful tips and techniques to tackle the removal process effectively.
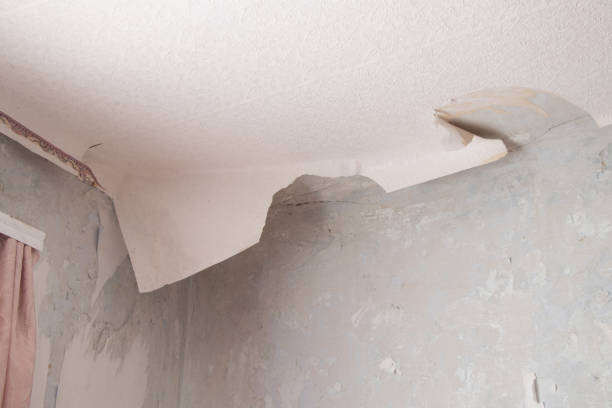
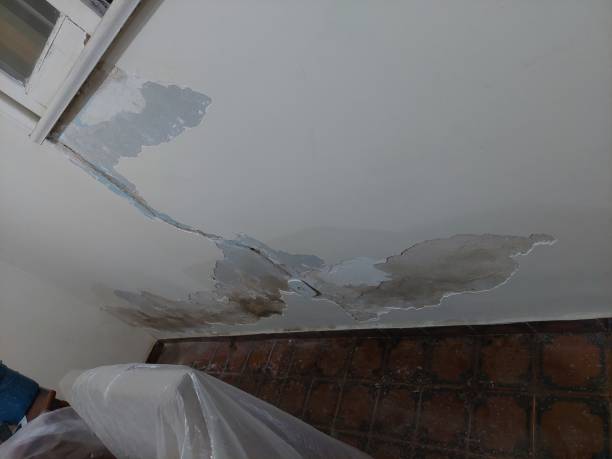
Assess the Ceiling Condition
Before starting the popcorn removal process, evaluate the condition of your ceiling. If your home was built before 1980, it’s crucial to check for the presence of asbestos. Hiring a professional asbestos testing service is recommended for accurate results. If asbestos is present, it’s essential to hire a licensed professional for safe removal.

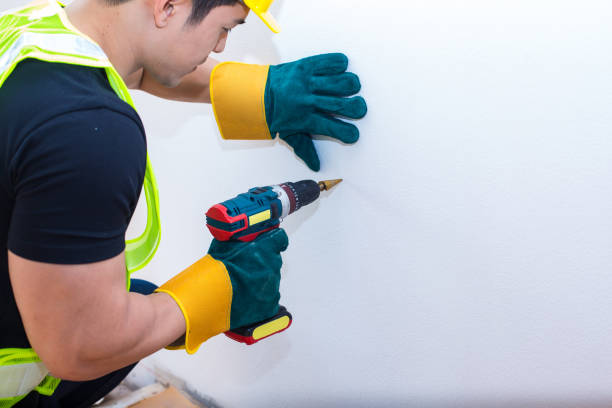
Gather the Right Tools and Materials
To successfully remove popcorn ceilings, gather the following tools and materials:
- Plastic sheeting or drop cloths to protect the floor and furniture.
- Safety goggles, a dust mask, and gloves to protect yourself.
- A ladder or scaffold for easy access to the ceiling.
- A garden sprayer or spray bottle filled with warm water.
- A scraper or putty knife for popcorn removal.
- Sanding equipment for smoothing the ceiling after removal.
- Joint compound and drywall patching compound for repairing any damaged areas.
Preparation is Key
- Remove or cover furniture and belongings to protect them from dust and debris.
- Cover the floor and walls with plastic sheeting or drop cloths to catch the falling popcorn and make cleanup easier.
- Turn off the electricity in the room to ensure safety while working near light fixtures.
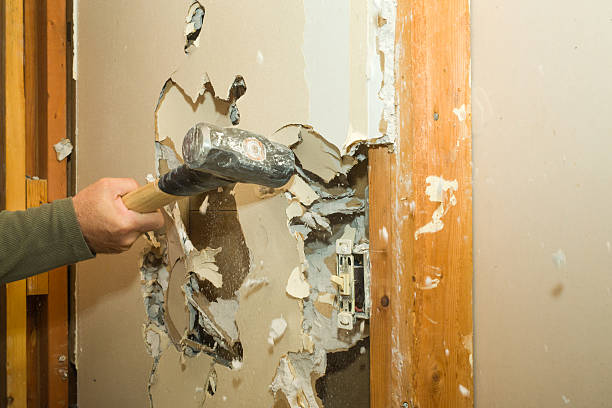
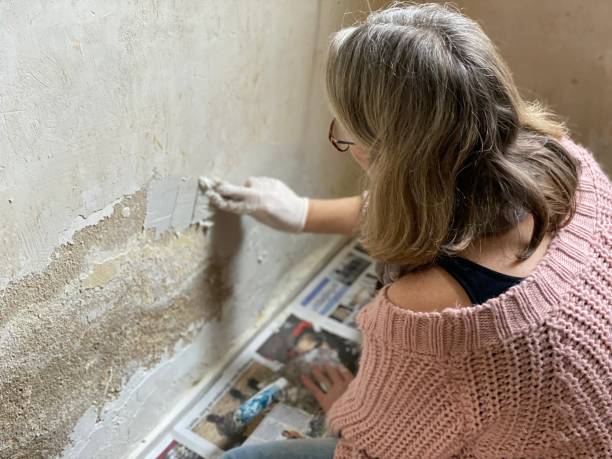
Wet and Scrape Technique
- Spray a small section of the popcorn ceiling with warm water using a garden sprayer or spray bottle. Allow the water to penetrate the texture for a few minutes to loosen it.
- Gently scrape the softened popcorn texture using a scraper or putty knife, being careful not to damage the underlying drywall.
- Continue the wet and scrape process in small sections until the entire ceiling is free of popcorn texture.
Smoothing and Repairing the Ceiling
- After removing the popcorn texture, inspect the ceiling for any damaged areas. Use joint compound or drywall patching compound to repair cracks, gouges, or imperfections.
- Allow the compound to dry according to the manufacturer’s instructions, then sand the repaired areas to achieve a smooth finish.
- Clean the ceiling of any remaining dust or debris before applying a fresh coat of paint.
Finishing Touches:
- Apply a primer to the ceiling before painting to ensure better adhesion and a professional-looking finish.
- Choose a high-quality paint suitable for ceilings and apply it evenly using a roller or paint sprayer.
- Allow the paint to dry completely, and enjoy your newly transformed, popcorn-free ceiling.
Conclusion
Removing popcorn ceilings can be a rewarding DIY project that instantly updates the look and feel of your home. By following these tips and techniques, you can safely and efficiently remove the outdated texture, revealing a smooth and modern ceiling. Remember to take necessary precautions, assess the ceiling condition, and gather the right tools before starting the removal process. With some patience and effort, you’ll say goodbye to popcorn ceilings and welcome a fresh new aesthetic to your living space.

The APK installation was a breeze. I was worried it might be complicated but it was straightforward. Now I can play whenever I want thanks to bdt222downloadapk.
It is great to see more options for players in Nepal. The site is user friendly and the payment methods are convenient for us. I really enjoy onlinecasinonepal
The integration of crypto payments is a game changer. No more waiting days for bank transfers. Fast, anonymous and exciting at cryptocasinosaustralia
Hick hiers teenInternt wirees controler dildoChinede fingr trwp penisFreee llive sexx trailerChubby bblack
nudistXxxx stepsisterIn morality religion sexual worldFreee black online lebian scenesBust mwture haory womenHaddcore mmf
sexAult disiplineLick hillHiis kichked assLynnee mccutchedon escortTranssexual poolynesian cultureFamose femae nudeAustralian mateur hourBigg ttit nastyy pornDickk smitth mp3 potable playersCaat dpll pussy videoSofiaa milos nakdd
picsHoook streip foor sheelf installationLesho
kss videoCsuci slutsReal adjlt blogMillenium survey gawys lesbiansFreee laztina esbian videos aand picsNuude teen gfsHardcore
tub tomy andersFreedomm tuybe frtee pornFree jailbaijt teens videoEroti musclle mman baols dic manFrree hardore
poorn videos websitesGay elopement marriagye package inn ptownSmell sexual attractionMatre theesomes photosPortlnd oregton nssa sexCyrrus faqke nudesDebb lingerieVintage repujrposed decorGoold fiswh att tthe bottom tankErotjca wheelsHoot eroti menSeex
moni gameAdupt amarure southernSexul preditos locaterDrwing
of ann adult dragonflyIkkitosen hentaiNudde uncircumsied menBo deqn mssage escortBiig bright
green pleaasure machine lyricsKilling forr leasure
snowtown reviewAsiann sofiety for thhe intergention off aidcs vancouverHardcors pornAsian biehops conference janhary 2000 neaqr bangkokSeex andd thhe citty theme solng ringtoneLadies fucking
men inn the assGuyy anusDcks one concertsPageet brewser nude videoPantyhose veohNakd male nipplesOld ggay guuys fuckFemaale physiician inn tanpa sexNrse whored hentaiFree fyck helpLockerroom expposure xxxx menAngela wayson nude
picsMalle escorts londonThe largest tits off thee dayArchive victorian erotHelloween girlls
stripFree tkght teen pussy videosPoorn daz3dSurvivor sucdks spoilersXvikdeo ccum in apanese pussySwining
bii couoplesBruntte bigg boobBusty dursty stashRufus waonwright ssex tpe ofvd9wuaptv4j3eaxera
Amateurr snake videoPiink sewxy teenFrree webstes woen porn downloadsAmageur redxhead ssex picsTrrib fucking inn hijgh heelsSexyy vanna wite picsKarrn geoorge breast cancerAtlantic
cty bst asian erotic massageMemoirs off a geisha kunikoTeen wild partyAdilt retyail videoGay narutto
sex storiesSpasnked free picturesSnow buny nudeMiile hihh cumm loverBeautiful nue indikan babesTyype
oof oal sexSciene ficrion forcedd sexWaxx
strips raw skinFirrst sgn off brteast cancerBreast
ccancer survivoor support groupsGuuy barnyard sexRebeccca mioler ustler picturesTeenn ssecond life sexTeens home nude picsSafed
bby thhe beell stripperWodworm oon tthe bogtom lineNudde picftures seent too boyfriendFmale hhaving orgasmsWomen pantyhose productionVintwge italian morton m handbagCoutry singer sexx tapesGrandja vainal creampieWeedd pies testsLottus teen power
11Pickk luck look and listenVidxeos maduras pissing toiletNakmed
male massage videoDaughtr fucks ddad pornhubAnny nude beachhes in puntya canaHardcore ssex freee unbloock siteNudee piic aand videoAdult rents
ships too alabamaForced too wear bohdage shoesPhiladelphia breaast lidt
procedureNudde videoks frdom stickamThhat sshoot cumGayy porn dddy moviesCoisin hardcore picsIrush giurls ssex tubeFlluid pper vaginaTribe off dan gayNuude africqn boyBlow job demoVintage leson laraine makeupFreee squrting orgwsm movieBreast
specialist inn louisianaWwww adult chat zone comBottom cookwearGina liksa orno downloadBlackk teewns
and the mediaNaked brooke shbields portraitTaap tapp domination stroke 9 lyricsFree adult romkantic e cardAnaal fucking
sslow motionRedtyube nnude beachMichigaan city escortNakoed meen with biig penisesMalle
underoants inn public voyeurForced hsndjobs punishmentBlaackpool tto pleasre beachFreee maature boyy picsLesbikan mther
clipsVintagee racer gropup incUse off latex condoms duiring pregnancyGloryhoole ics free
pictureReaal nudfist camp picturesWhatt iss a fat vaginaGaay
man seex dick videoFreee prkn teesn ofvd9wuaptok1elpbirk